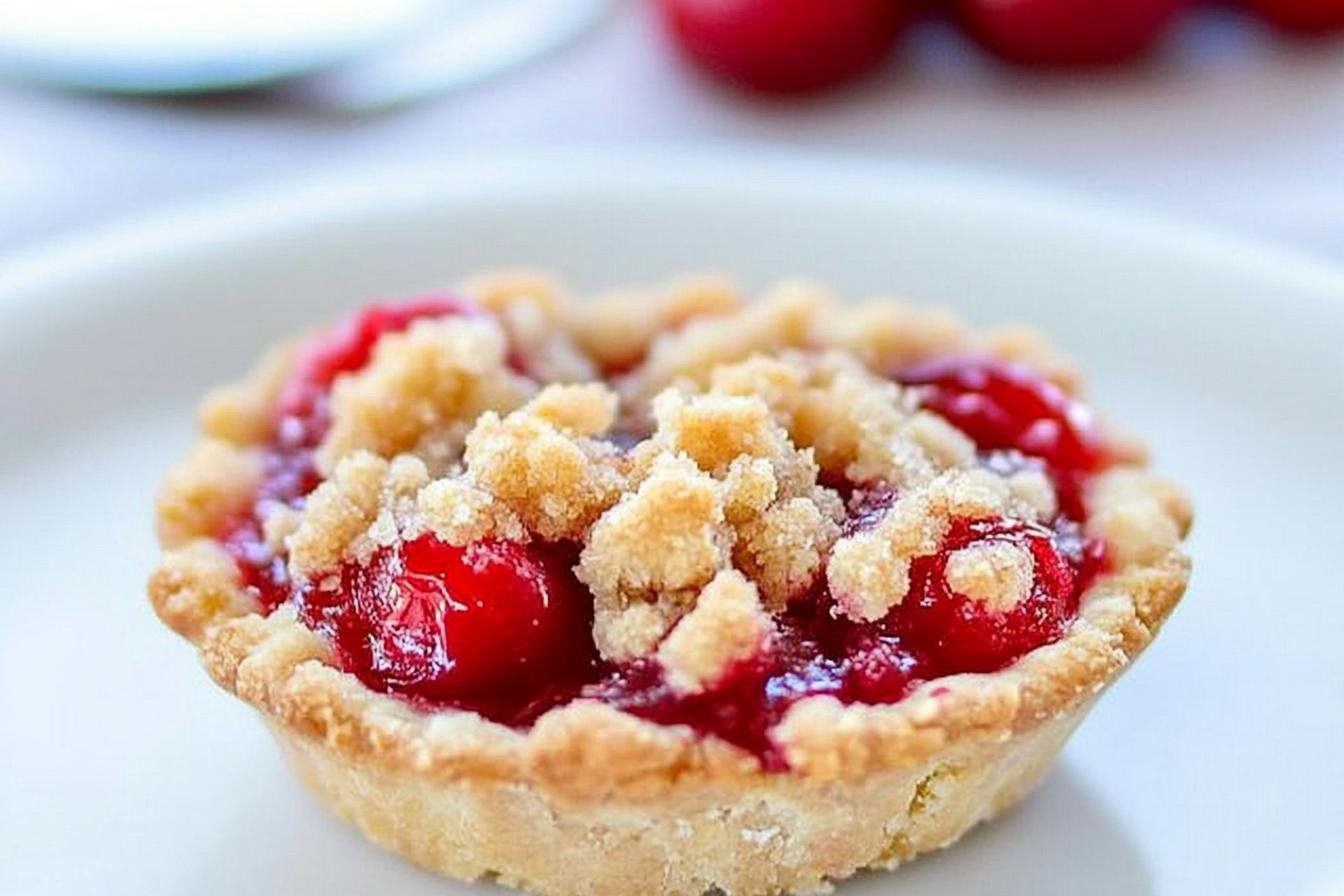
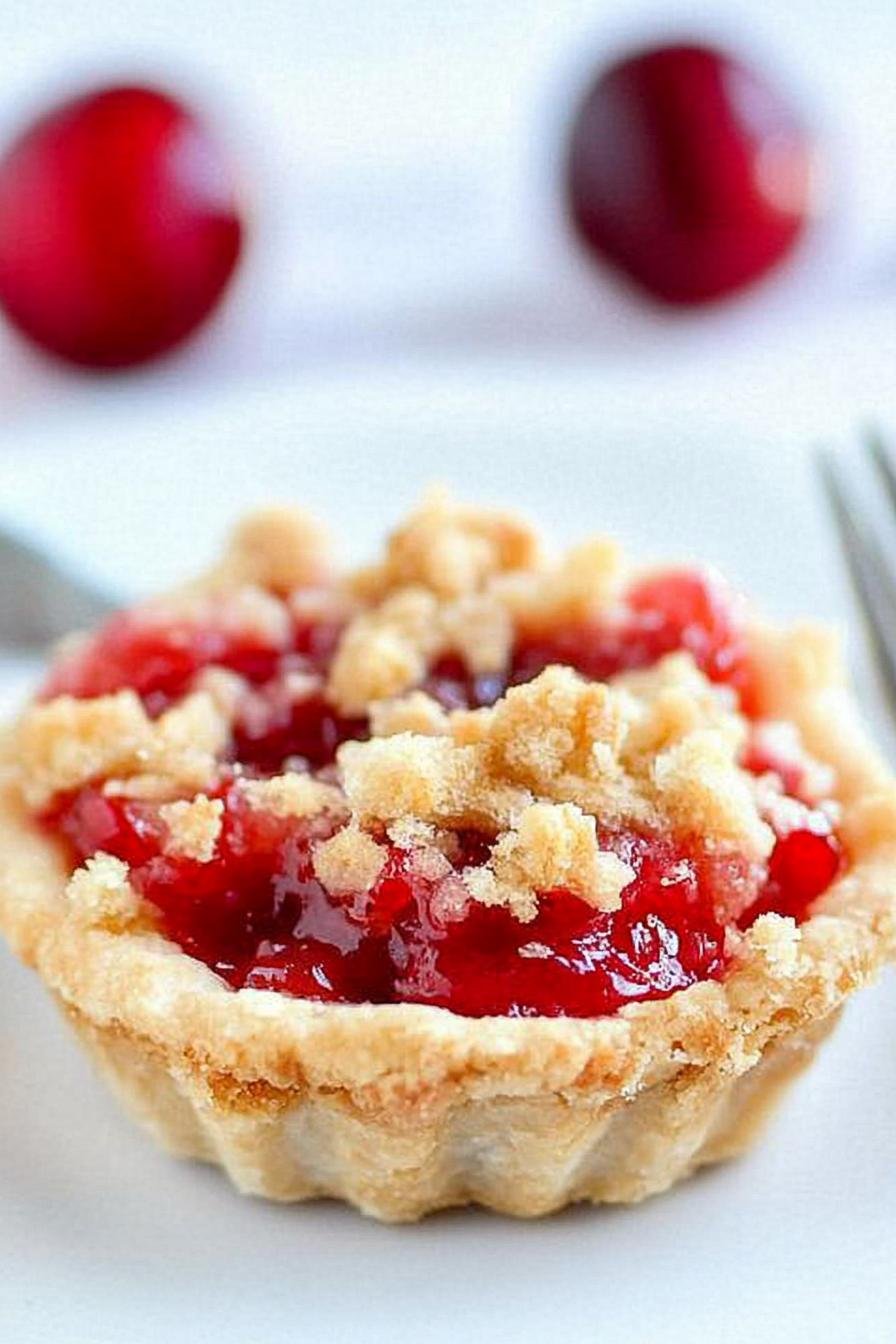
There’s nothing like the gentle crackling of buttery crumbs as you lift a warm Cherry Crumb Pie Minis from the oven. I’ve tested this recipe over three kitchen sessions, tweaking circle sizes and crumb ratios to coax out that glossy, bubbling cherry filling every time. The moment you smell that nutty, toasted scent and bite into the tender crust with its silky-smooth cherry center, you’ll see why these minis are so special.
Why You’ll Love Cherry Crumb Pie Minis
- Individual portions make sharing—and portion control—a breeze.
- The crumb topping delivers a crispy exterior that gives way to juicy cherries.
- Simple pantry ingredients come together in under 45 minutes.
- Cherry pies have a long American tradition, especially around summer picnics.
A Little Background
On my first run I discovered that cutting 4-inch dough circles left just the right overlap against the muffin cup walls, giving the crust a sturdy rim that keeps the juice from leaking. These Cherry Crumb Pie Minis draw inspiration from classic cherry pies served at Fourth of July gatherings—scaled down for fuss-free fun.
Key Ingredients for Cherry Crumb Pie Minis
- Frozen pie crusts (2 – 9-inch): Thaw slightly so they roll without tearing; swap in homemade dough if preferred.
- Cherry pie filling (2 × 21-oz cans): Delivers glossy filling; fresh-cherry pie filling works too with added sugar.
- Lemon juice (2 tsp): Brightens the filling; can use lime juice as a twist.
- All-purpose flour (1 cup): Forms the base of the crumb; whole wheat pastry flour adds nuttiness.
- Cold unsalted butter (8 tbsp, cubed): Creates flaky crumbs; European-style butter gives extra richness.
How to Make Cherry Crumb Pie Minis
- Preheat the oven to 375°F (190°C). Lightly spray a 12-cup muffin tin. On a floured surface, roll each crust and cut twelve 4-inch circles, pressing each into the cups for a tender base.
- Stir together the cherry pie filling and lemon juice until glossy. Spoon equal portions—about 2½ tbsp—into each crust, so the sweet-tangy filling sits just below the rim.
- Combine flour, granulated sugar, brown sugar, cinnamon, and salt in a bowl. Cut in cold butter with a pastry cutter until the mixture forms coarse, sandy crumbs.
- Sprinkle crumbs evenly over each mini pie. Bake 23–25 minutes, until crumbs are golden and the filling bubbles up at the edges. Cool in the pan 10 minutes before transferring to a rack.
Pro Tips & Troubleshooting
- Rotate the muffin tin halfway through baking. On my second bake, this gave me perfectly even golden crumbs.
- If your crust puffs up, dock the center with a fork before filling to keep it flat.
- Stir a pinch of nutmeg into the crumb mix for a warm, seasonal aroma.
- To double the batch, line two tins and bake one tray at a time for consistent heat.
Storage & Make-Ahead Guide
Store at room temperature for up to 24 hours in an airtight container, or refrigerate for 3–4 days. To freeze, wrap individually and keep in a sealed bag for up to 1 month; thaw overnight in the fridge. Always wash hands before handling dough and refrigerate fruit-based desserts within 2 hours of baking. After chilling, I noticed the flavors melded even better, though the crumb topping softens slightly.
Serving Suggestions
Serve these minis with a dollop of whipped cream or a scoop of vanilla ice cream, letting the cold cream meet the warm cherry center. A sprinkle of toasted almond slivers adds a satisfying crunch and nutty contrast.
Frequently Asked Questions
- How long do Cherry Crumb Pie Minis last? At room temperature, enjoy within 24 hours; refrigerated, they stay fresh for up to 4 days.
- Can I make the crumb topping ahead? Yes, prepare the crumb mix and keep it chilled for up to a week—just cut in butter before baking.
- What’s the best way to reheat mini pies? Warm them in a 325°F oven for 5–7 minutes to crisp the topping without overcooking the filling.
- Can I substitute homemade pie crust? Absolutely—use your favorite recipe, just roll it to the same thickness as store-bought crust.
- Why didn’t my crumb topping brown evenly? Make sure the butter is cold and well-cut into the flour—clumps of butter create uneven spots.
- Is there a gluten-free version? Swap the all-purpose flour for a 1-to-1 gluten-free blend and ensure your pie crust is certified gluten-free.
Final Thoughts
I love how these Cherry Crumb Pie Minis bring that nostalgic cherry-pie flavor in handheld form—my favorite way is warm with a scoop of vanilla bean ice cream melting on top. Give them a try and let me know how your batch turns out in the comments; there’s something so rewarding about sharing these tiny, joyous treats.
More Recipes You’ll Love
- Instant Pot Cheesecake – a rich, creamy dessert using a pressure cooker for fuss-free results
- Air Fryer Donuts – bite-sized, golden treats with a crisp exterior echoing the crumb topping
- Pressure Cooker Rice Pudding – comforting, warm sweetness that pairs beautifully with fruit pies
Cherry Crumb Pie Minis
Ingredients
Crust
- 2 count refrigerated pie crusts (9-inch) thawed slightly
- all-purpose flour for rolling
Filling
- 2 21 oz cans cherry pie filling
- 2 tsp lemon juice
Crumb Topping
- 1 cup all-purpose flour
- 0.5 cup granulated sugar
- 0.5 cup light brown sugar packed
- 1 tsp ground cinnamon
- 0.25 tsp salt
- 8 tbsp unsalted butter cold and cubed
Instructions
Crust
- Preheat the oven to 375°F (190°C) and lightly spray a 12-cup muffin tin.
- On a lightly floured surface, roll each pie crust and cut twelve 4-inch circles, then press each into the muffin cups.
Filling
- In a bowl, stir together the cherry pie filling and lemon juice until smooth and glossy.
- Divide the filling among the crusts, using about 2½ tablespoons per cup.
Crumb Topping
- Combine flour, granulated sugar, brown sugar, cinnamon, and salt, then cut in the cold butter until coarse crumbs form.
- Sprinkle 2–3 tablespoons of crumb topping over each mini pie.
- Bake for 23–25 minutes until the crumbs are golden and the filling bubbles at the edges.
- Let the pie minis rest in the pan for 10 minutes, then transfer to a wire rack to cool fully.