Imagine a slice of Strawberry Rhubarb Pie, where the sweet aroma of strawberries dances with the tart tickle of fresh rhubarb. After multiple tests, I’ve discovered the perfect balance between sweetness and tartness, culminating in a crust that’s golden and flaky. Each bite transports you to a summer picnic, complete with laughter and sunshine. If you’re also curious about classic desserts, check out my Creamy Italian Meatball Soup for another comforting recipe.
About Strawberry Rhubarb Pie
Strawberry Rhubarb Pie is a cherished American classic, straddling the line between sweet and tart with every slice. During my testing phase, I tried various ratios of berries and rhubarb, noting how each influenced the final flavor. This pie transforms simple ingredients into a delightful dessert, perfect for gatherings or as a cozy treat on a rainy day.
- Quick prep time means it’s possible for weeknight baking.
- It’s budget-friendly, using seasonal fruits that are easy to find.
- A family favorite, it brings a nostalgic comfort to the table.
- Rhubarb has a long history in American kitchens, valued for its unique tang.
Key Ingredients & Their Roles
- Fresh Rhubarb: Provides the key tart flavor; substitute with sorrel for a similar effect.
- Frozen Strawberries: Adds sweetness and a jammy texture; can swap with fresh strawberries when in season.
- Granulated Sugar: Balances the tartness; can reduce for a less sweet pie.
- Cornstarch: Helps thicken the fruit filling for a perfect slice; arrowroot can be used as an alternative.
How to Make Strawberry Rhubarb Pie
- Preheat your oven to 400°F. Gather your ingredients, noting the vibrant colors of rhubarb and strawberries.
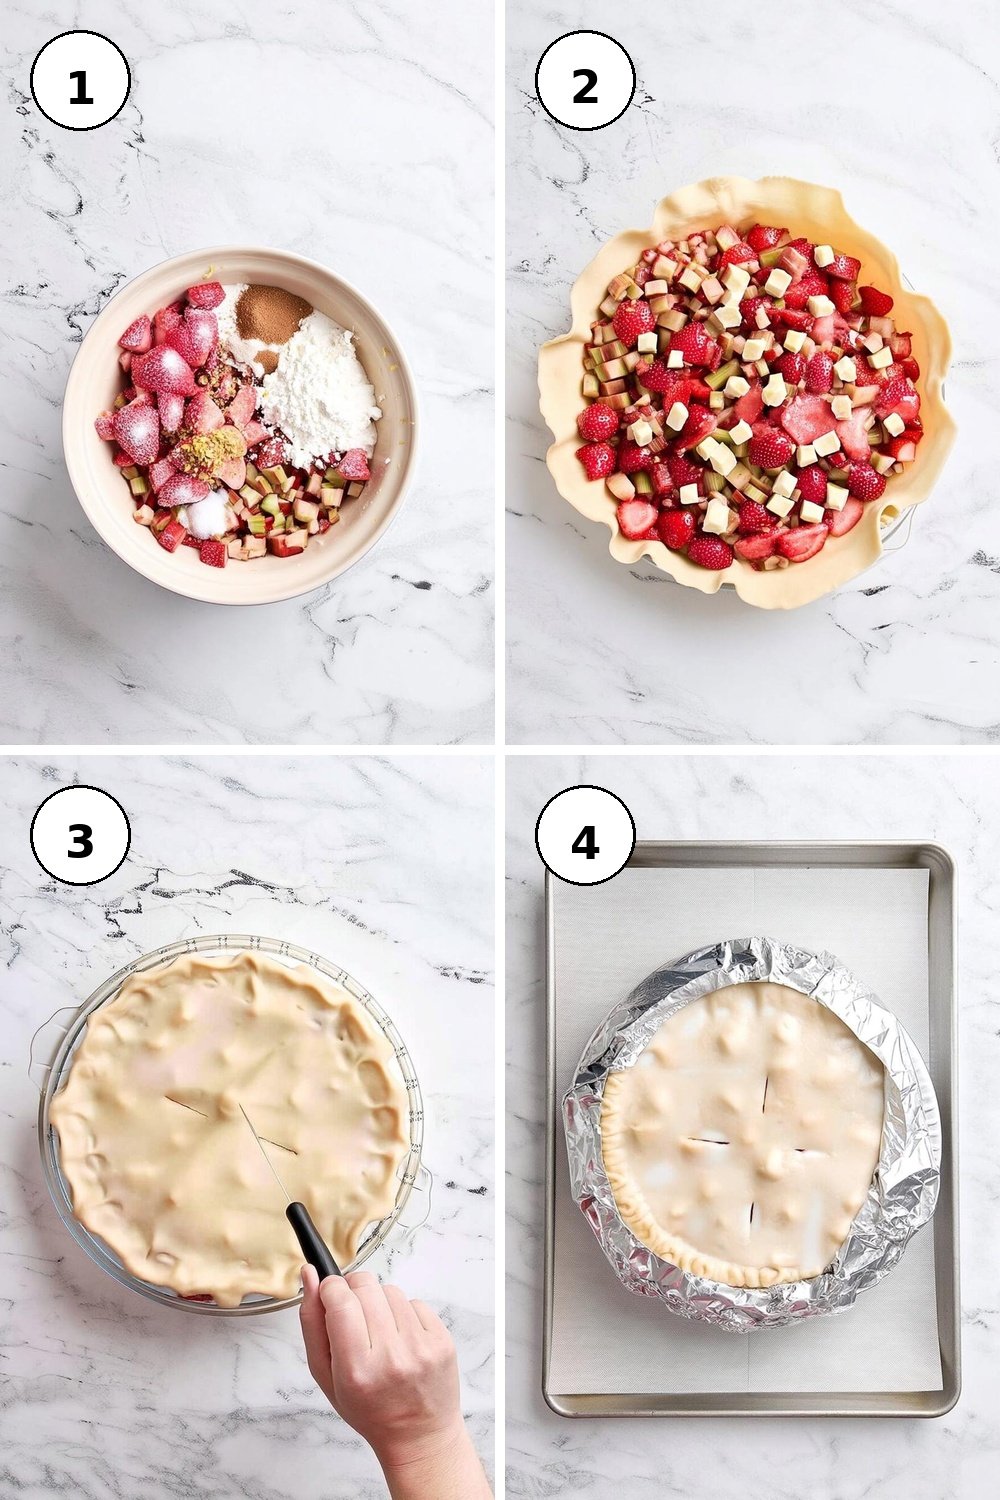
- In a large bowl, toss together rhubarb, frozen strawberries, sugar, cinnamon, cornstarch, lemon juice, zest, vanilla, and salt until well-combined, creating a fragrant mixture.
- Roll out the first pie crust to fit a 9-inch pie pan and let the excess hang over the edges. Pour the fruit mixture onto the crust, distributing it evenly.
- Top with small dabs of butter, roll the second crust, and seal the edges by pinching. Vent the top crust and brush with milk for a lovely golden finish.
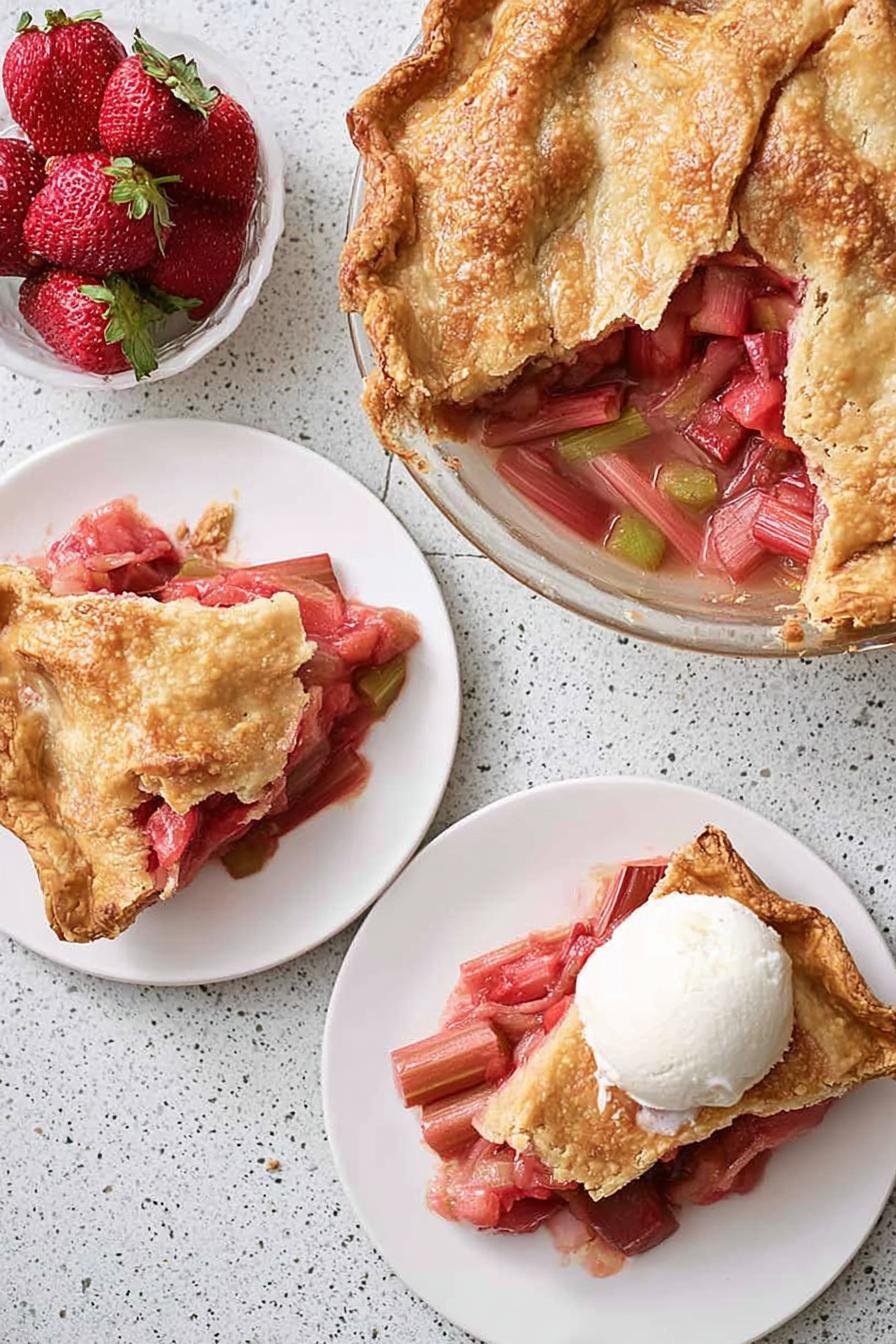
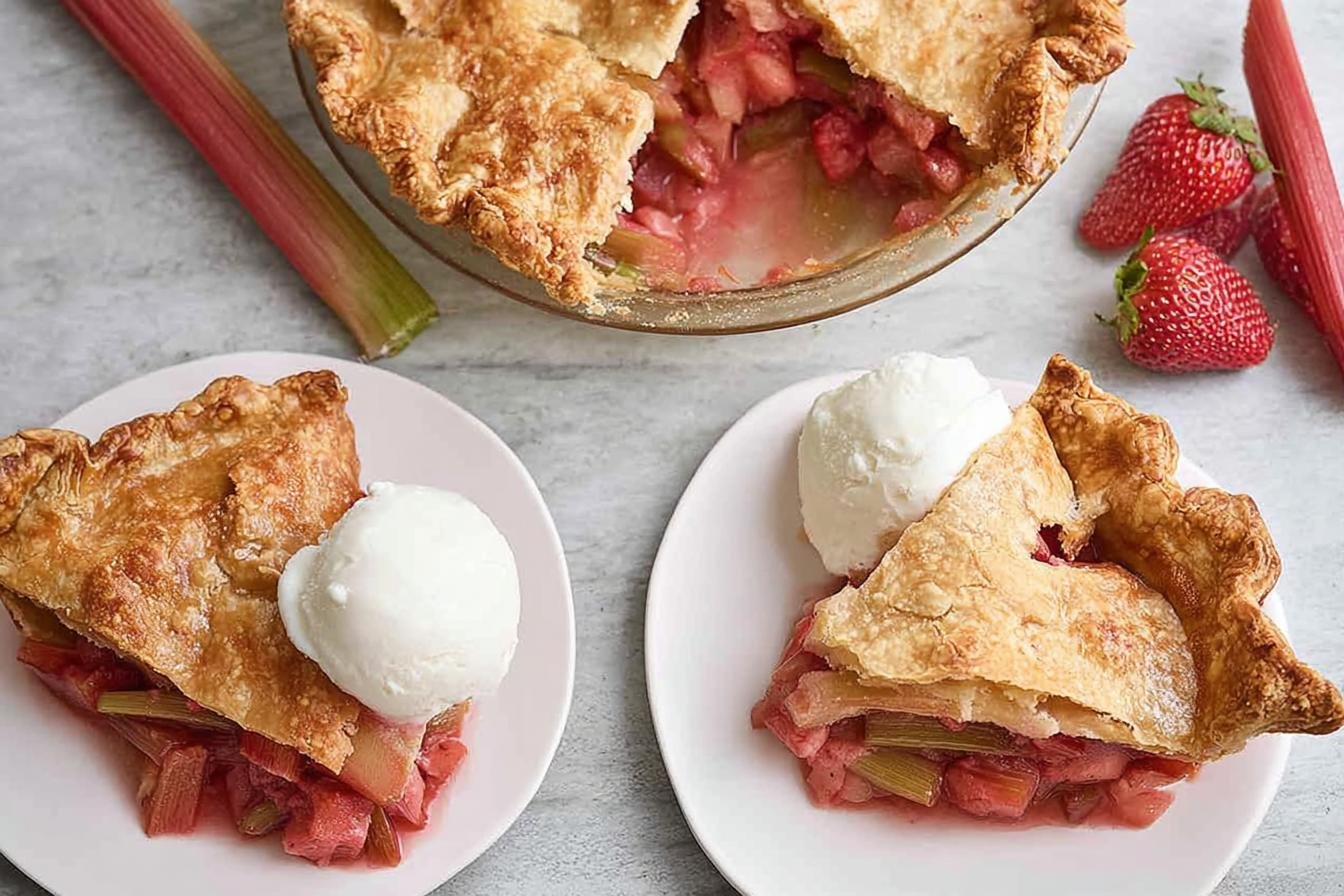
- Place foil around the edges, bake for 30-45 minutes, then remove the foil and continue baking until the crust turns golden brown, about 25-30 minutes more. Let it cool before slicing to let the juices settle.
Pro Tips & Troubleshooting
- When rolling out your crust, sprinkle flour generously to prevent sticking; this also makes for a better texture.
- If your filling seems too watery, mix in extra cornstarch or let it sit longer to allow juices to thicken adequately.
- Try adding a touch of almond extract for a unique flavor twist that pairs beautifully with the fruity filling.
- This recipe doubles easily for larger gatherings—simply adjust baking time if using larger pans.
Storage & Make-Ahead Guide
Store leftover Strawberry Rhubarb Pie in the refrigerator for up to 3 days. For longer storage, wrap it tightly and freeze for up to 2 months. When reheating, bake in the oven at 350°F for about 15-20 minutes to restore the crust’s flakiness. I found that freezing the pie retains its quality remarkably well, and it’s a delightful surprise to pull it out for an unexpected treat.
Serving Suggestions
Serve warm with a scoop of vanilla ice cream for added creaminess, or pair with a dollop of whipped cream for a refreshing finish. For a full meal experience, consider pairing it with my Vegetable Soup or a slice of Spinach Ricotta Stuffed Shells.
Frequently Asked Questions
- Can I use fresh rhubarb instead of frozen? Yes, just be sure to adjust the sugar since fresh can sometimes be tart.
- How do I know when the pie is done? The crust should be golden and the filling bubbly; a fork should easily pierce through.
- Can I make this pie ahead of time? Absolutely! Bake it a day in advance and refrigerate, then reheat before serving.
- What’s the best way to serve the pie? Warm, with either whipped cream or ice cream, enhances the flavors perfectly.
- Can I use a gluten-free crust? Yes, gluten-free pie crusts work well; just ensure your fillings are also gluten-free.
Final Thoughts
Baking this Strawberry Rhubarb Pie has become a cherished ritual for me, evoking memories of sunny days and family gatherings. I love serving it warm, celebrating the beloved flavors with loved ones. I encourage you all to try this recipe, and please share your experiences and tweaks with me!
More Recipes You’ll Love
- Cranberry Orange Glazed Turkey Breast – complements the tartness of rhubarb with a citrus twist
- Maple Balsamic Brussels Sprouts – connection via the sweetness of maple and the tartness of rhubarb
- Cherry Crumb Pie Minis – seasonal pairing with similar stone fruit flavor profiles
Strawberry Rhubarb Pie
Ingredients
- 1 lb fresh rhubarb leaves removed, trimmed, washed, cut into ½-inch pieces
- 1 lb frozen strawberries
- 1 cup granulated sugar
- 1/2 tsp ground cinnamon
- 1/4 cup corn starch
- 1/2 lemon juice and zest
- 1 tsp vanilla extract
- 1/4 tsp salt
- 2 pie crusts 9-inch pre-made crusts room temperature
- 2 Tbsp butter small dice
- 1 Tbsp milk
Instructions
- Preheat the oven to 400°F. Gather and prepare all ingredients.
- In a large bowl, combine the rhubarb, strawberries, sugar, cinnamon, cornstarch, lemon juice, zest, vanilla, and salt. Gently fold together and set aside.
- Roll out one pie crust, larger than the 9-inch pie pan, and place it on the bottom of the pie pan, pressing the bottom and sides. You want the excess pie crust to be hanging over.
- Pour the filling onto the pie crust and evenly top with butter pieces.
- Roll out the second pie crust and place on top, pinching the edges with the bottom crust to seal. Crimp the pie crust into decorative edges.
- Cut slits in the top pie crust to vent during the baking process. Brush with milk.
- With 3-inch strips of tin foil, line the edges of the pie to prevent burning.
- Place the pie on an oven-safe tray and place it in the oven. Bake for 30-45 minutes. Remove the tin foil and cook an additional 25-30 minutes until the crust is golden. Remove the pie from the oven and let it cool before cutting.