There’s nothing quite like the smell of apple cider simmering on the stove on a crisp fall afternoon. It fills the whole house with the scent of warm cinnamon and sweet apples, and honestly, it does more to set the mood for the season than any candle ever could. This homemade apple cider recipe takes that cozy feeling and turns it into something you can sip from your own mug, made entirely from real apples and warm spices, with nothing artificial in sight.
If you’ve only ever had apple cider from a grocery store jug, you’re in for a pleasant surprise. Making it from scratch is simple, mostly hands-off, and gives you a depth of flavor that store-bought versions just can’t match. It’s the kind of drink that makes your kitchen smell incredible for hours, and it’s just as satisfying to make as it is to drink.

Why You’ll Love This Recipe
- Made from real apples, not concentrate or added flavoring, so the taste is naturally rich and true.
- Simple ingredients you likely already have in your pantry, aside from the apples themselves.
- Mostly hands-off cooking — once it’s simmering, you can walk away and let your stove do the work.
- Naturally sweetened, with just enough sugar to balance the apples without making it overly sweet.
- Perfect for a crowd, with a yield generous enough for gatherings, fall parties, or holiday mornings.
- Versatile serving options — enjoy it warm by the mugful or chilled over ice, depending on your mood.
Ingredients
- 10 large apples (we recommend a mix of 5 Gala and 5 Honeycrisp for the best balance of sweetness and tartness)
- 16 cups water
- 3/4 cup sugar
- 1 tablespoon ground cinnamon
- 1 tablespoon ground allspice
- 6 cinnamon sticks
Step-by-Step Instructions
- Prep the apples. Quarter each apple and remove the core, then place all the apple pieces into a large stockpot. Pour in the water.
- Add the spices. Stir in the sugar, ground cinnamon, ground allspice, and cinnamon sticks until everything is well combined.
- Simmer low and slow. Bring the mixture to a gentle simmer over medium heat. Once simmering, cover the pot with a lid and let it cook for 2 hours, allowing the apples to soften completely and release their flavor into the water.
- Strain the cider. After simmering, give the mixture a good stir, then carefully strain it through a fine-mesh sieve into a clean pot or large pitcher, discarding the softened apple solids. For an extra-smooth finish, line the sieve with cheesecloth and strain the cider a second time.
- Serve it your way. Enjoy the cider warm right away, or refrigerate it for 1–2 hours if you prefer it served cold over ice.
Expert Tips
- Mix your apple varieties. Combining a sweeter apple like Gala with a firmer, slightly tart variety like Honeycrisp gives the cider more depth than using just one type.
- Don’t rush the simmer. The full 2 hours is what allows the apples to break down and infuse the water with real apple flavor, so resist the urge to shorten the cooking time.
- Double-strain for clarity. The first strain removes the bulk of the solids, but the cheesecloth step is what gives you that smooth, café-style texture without any grit.
- Taste before serving. Apples vary in natural sweetness, so give your cider a taste after straining and add a touch more sugar if needed.
- Save the spent apples for compost rather than tossing them in the trash, since they’ve already given up most of their flavor to the cider.
Variations
This recipe is wonderful as-is, but it’s also a great base to build on. If you want a deeper spice flavor, try adding a few whole cloves or a split vanilla bean to the pot while it simmers. For a citrusy twist, toss in a few orange slices along with the apples. And if you’re hosting friends for a cozy fall night in, this cider makes a fantastic base for a spiked version — it’s actually the same idea behind a warm apple cider sangria, which combines cider with wine and fall spices for an adults-only twist. If you love spiced fall drinks in general, a pumpkin spice fireball sangria is another cozy option worth trying once the cider craving hits.
Storage and Reheating
Let any leftover cider cool slightly, then transfer it to an airtight container or pitcher and store it in the refrigerator for up to 5 days. To reheat, warm it gently on the stovetop over low heat or in the microwave in short bursts, stirring occasionally, until it reaches your desired temperature. Avoid boiling the cider when reheating, as high heat can dull the fresh apple flavor. This cider also freezes well for up to 3 months — just leave a little room at the top of your container, since liquids expand as they freeze.
Serving Suggestions
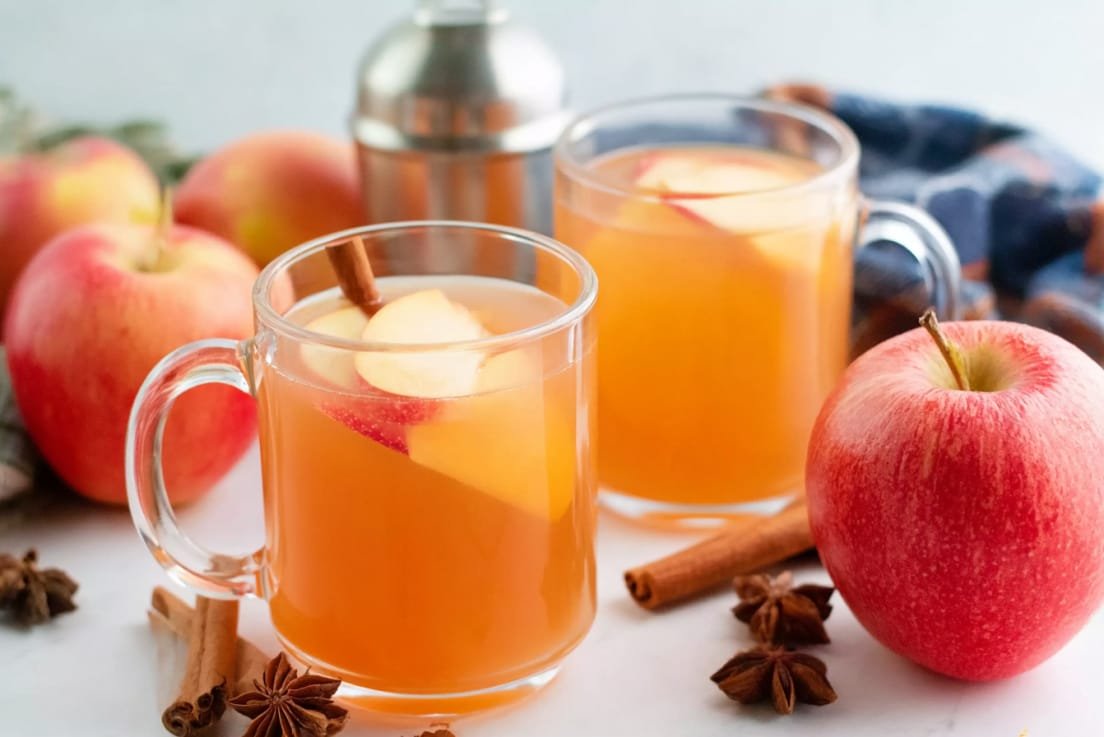
Serve this cider warm in mugs with a cinnamon stick stirrer for a cozy touch, or pour it over ice for a refreshing cold-weather treat. It pairs beautifully with fall desserts like a spiced pear cobbler, or alongside a fresh fall fruit salad for brunch. For a festive presentation at a party, ladle it from a slow cooker set to “warm” so guests can help themselves throughout the evening, much like you would with a holiday punch.
FAQ
Can I use a different type of apple?
Yes, almost any baking apple will work well here. Just look for a mix of sweet and tart varieties, such as Fuji, Braeburn, or Granny Smith, to keep the flavor balanced.
Do I need to peel the apples first?
No peeling required. The skins add color and flavor to the cider and get strained out at the end, so there’s no need for the extra step.
Can I make this in a slow cooker instead of on the stove?
Yes. Add all the ingredients to a slow cooker and cook on low for 6–8 hours or on high for 3–4 hours, then strain as directed.
Why is my cider cloudy even after straining?
A single strain through a fine-mesh sieve will still let some fine apple particles through. Straining a second time through cheesecloth removes those finer bits and gives you a clearer cider.
Can I reduce the sugar?
Absolutely. Start with less sugar and add more to taste after straining, especially if your apples are already very sweet.
Once you’ve made apple cider from scratch, it’s hard to go back to the store-bought version. It’s simple, deeply flavorful, and turns any afternoon into a cozy one.
Homemade Apple Cider Recipe
Ingredients
- 10 large apples 5 Gala and 5 Honeycrisp recommended
- 16 cups water
- 3/4 cup sugar
- 1 tablespoon ground cinnamon
- 1 tablespoon ground allspice
- 6 cinnamon sticks
Instructions
- Quarter the apples and remove the cores. Place the apple pieces in a large stockpot and add the water.
- Stir in the sugar, ground cinnamon, ground allspice, and cinnamon sticks.
- Bring the mixture to a simmer over medium heat, cover with a lid, and continue simmering for 2 hours.
- Stir well, then strain the mixture through a fine-mesh sieve, discarding the solids. For a smoother cider, line the sieve with cheesecloth and strain a second time.
- Serve warm, or refrigerate for 1–2 hours before serving cold.
Notes
Nutrition: Not specified in original recipe