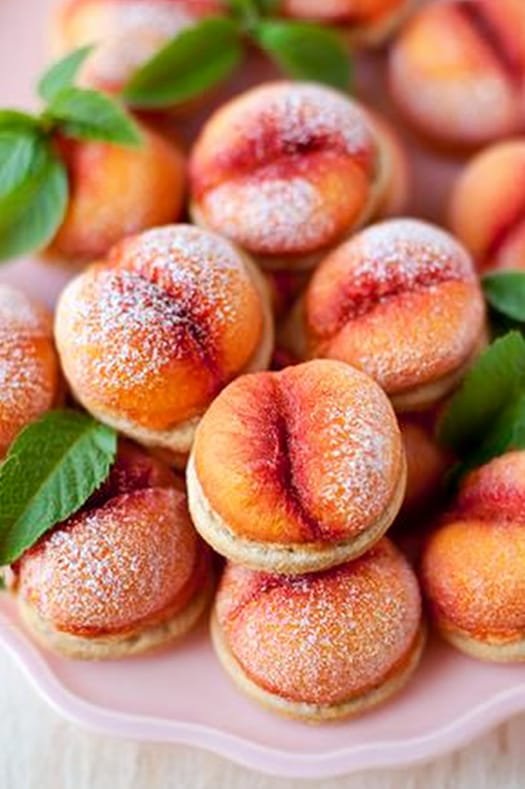
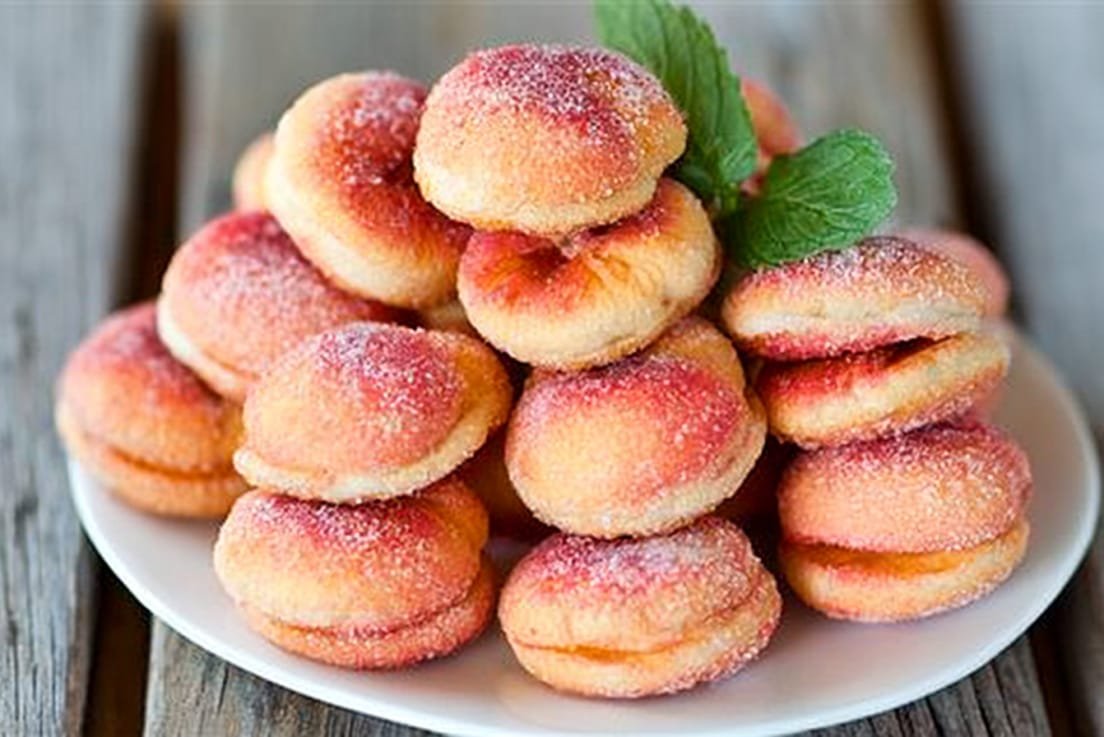
There are certain recipes that stop people in their tracks the moment they see them, and these Peach Cookies are absolutely one of them. Soft, buttery cookie halves are filled with peach jam, sandwiched together, and then painted with tinted milk and rolled in sparkling sugar until they look remarkably — almost magically — like real peaches. Tuck a fresh mint leaf into the side of each one and the illusion is complete. They are the most charming thing you will ever set on a dessert table.
These beautiful little cookies are inspired by a beloved Italian tradition of making cookies that mimic the appearance of fruit, and they are as delicious as they are impressive. The cookies themselves are tender, lightly sweet, and perfectly buttery. The peach jam filling adds a fruity, jammy center that makes every bite genuinely satisfying. And the painted sugar coating gives each cookie a sparkling, dewy finish that makes them look like they were just plucked from a tree.
Why You’ll Love These Peach Cookies
They are absolutely show-stopping. There is no other word for it. Set a platter of these on a table and watch every single person stop and stare before they even think about reaching for one.
The taste matches the look. These are not just pretty cookies — the buttery, slightly tangy dough paired with sweet peach jam filling makes them genuinely delicious from first bite to last.
They are a wonderful creative project. Decorating these cookies is genuinely fun. The painting process is relaxing and meditative, and each cookie turns out beautifully unique with its own blend of red and yellow.
They are perfect for special occasions. Parties, showers, holiday gatherings, summer celebrations — these cookies are a centerpiece on any dessert spread and always earn genuine gasps of delight from guests.
They are simpler than they look. Yes, they require a little patience and an extra decorating step, but the techniques involved are entirely accessible to any home baker. If you can roll dough into a ball and handle a paintbrush, you can make these.
Ingredients
Here is everything you need to make these Peach Cookies:
- 1 1/2 cups all-purpose flour
- 1 3/4 teaspoons baking powder
- 1/4 teaspoon salt
- 10 1/2 tablespoons butter, softened
- 1/3 cup granulated sugar
- 1/4 cup packed light brown sugar
- 1 large egg
- 2 tablespoons sour cream
- 3/4 teaspoon vanilla extract
- Peach jam or preserves (for filling)
- 6 tablespoons milk, divided
- Red food coloring
- Yellow food coloring
- 1/2 cup granulated sugar (for rolling)
- Fresh mint leaves for garnish (optional)
- A clean paintbrush
You will also want to butter your hands lightly before rolling the dough into balls — the dough is soft and slightly sticky, and buttered hands make rolling much neater and more enjoyable. Keep a small dish of softened butter nearby as you work.
For the peach jam, a good quality peach jam or preserve with visible fruit pieces gives the best flavor in the filling. The jam should be spreadable but not runny — if it is very liquid, a brief stir and a minute in the microwave can help it thicken slightly before use. You want it to stay put when you sandwich the cookies together.
Step-by-Step Instructions
Step 1 – Make the Cookie Dough
Preheat your oven to 375 degrees Fahrenheit. In a medium mixing bowl, whisk together the flour, baking powder, and salt. Set aside. In the bowl of a stand mixer fitted with the paddle attachment, beat the softened butter, granulated sugar, and light brown sugar on medium-low speed until well blended and creamy, about one minute. Add the egg and vanilla extract and mix until incorporated. Add the sour cream and mix until smooth. With the mixer on low, gradually add the flour mixture and mix only until just combined — do not overmix.
Step 2 – Roll and Bake
Scoop the dough out one level tablespoon at a time. With lightly buttered hands, roll each portion into a smooth, round ball. Place the dough balls on a parchment-lined baking sheet, fitting as many as your sheet comfortably holds with space between them. Bake for 14 to 15 minutes until the bottoms are lightly golden brown. Transfer to a wire rack and allow to cool completely before moving to the next steps.
Step 3 – Fill and Sandwich
Once the cookies are fully cooled, spread about one teaspoon of peach jam evenly across the flat bottom of one cookie. Press a second cookie firmly over the jam, flat sides together, to form a sandwich. The two halves should align and hold together snugly. Repeat with all remaining cookies.
Step 4 – Paint the Cookies
Pour three tablespoons of milk into each of two small bowls. Add red food coloring to one bowl and stir until the milk reaches a vibrant, saturated pink. Add yellow food coloring to the other bowl and stir until it reaches a bright, vivid yellow. Using a clean paintbrush, dip into the yellow tinted milk and paint randomly across the surface of each sandwich cookie, leaving some areas unpainted. Work quickly and use as little milk as possible — you want a light wash of color, not a soaking. Too much milk will make the cookies soggy.
Step 5 – Add the Red and Roll in Sugar
Dip the paintbrush into the red tinted milk and paint across the unpainted areas of each cookie, blending slightly where the colors meet to create a natural, peachy gradient. Again, use as little milk as possible. Immediately after painting each cookie, drop it into the bowl of granulated sugar and roll to coat all over, pressing gently so the sugar adheres fully and evenly to the entire surface.
Step 6 – Garnish and Store
If desired, tuck one or two fresh mint leaves into the side of each finished cookie where the two halves meet. The mint leaf serves as the peach leaf and completes the illusion beautifully. Store the finished cookies in an airtight container.
Expert Tips for the Best Peach Cookies
Use as little milk as possible when painting. This is the single most important technique note in the entire recipe. The goal is a thin wash of color, not a saturated soak. A barely dipped brush loaded with very little milk gives you beautiful color without softening the cookie. Err on the side of too dry rather than too wet.
Roll in sugar immediately after painting. Do not let the painted cookie sit before rolling. The sugar needs to adhere to the slightly damp surface of the fresh paint — waiting too long means the milk dries and the sugar will not stick properly.
Work one or two cookies at a time. Paint one or two cookies, roll them in sugar, set them aside, then move to the next pair. This keeps the workflow manageable and ensures the sugar always adheres while the paint is still fresh.
Butter your hands generously before rolling. This prevents the soft dough from sticking to your palms and makes it much easier to roll smooth, uniform balls. Re-butter your hands every few cookies as needed.
Allow cookies to cool completely before filling. Filling warm cookies with jam will cause the jam to melt and run rather than staying in place as a neat layer. Patience here is key.
Let the finished cookies rest for a few minutes before serving. The sugar coating sets into a slightly firmer, more stable crust as it sits, making the cookies easier to handle and eat.
Variations
Try a different jam flavor. While peach jam is the obvious choice to match the cookie’s appearance, apricot jam makes an equally lovely and naturally golden-hued filling. Raspberry jam creates a deliciously tart contrast to the sweet cookie dough.
Add almond extract. Swap half the vanilla extract for almond extract in the dough for a subtle, nutty note that is a classic pairing with peach flavor and gives the cookies a slightly more complex character.
Make them extra peachy. Stir a teaspoon of peach extract into the dough alongside the vanilla for a more intensely fruity flavor that really leans into the peach theme from the inside out.
Use gel food coloring for more vibrant results. Gel food coloring is more concentrated than liquid food coloring and produces more vivid, saturated shades of red and yellow with less liquid — which means less risk of making the cookies soggy during the painting step.
Make them for holidays. These cookies are stunning not just for summer but for any occasion. With a different jam filling and color scheme, the same technique can be used to make apple cookies, orange cookies, or even watermelon cookies for a fun seasonal variation.
Storage
Room temperature: Store the finished cookies in an airtight container at room temperature for up to three days. Place a small piece of parchment between layers to prevent the sugar coating from sticking. The cookies will soften slightly over time as the sugar coating absorbs any ambient moisture.
Refrigerator: These cookies can be refrigerated in an airtight container for up to five days. Allow them to come back to room temperature before serving for the best texture and flavor.
Freezing: The unfilled, undecorated cookie halves can be frozen in an airtight bag for up to two months. Thaw at room temperature, then fill, sandwich, paint, and sugar coat them fresh. Assembled and decorated cookies are not ideal for freezing as the sugar coating will become sticky upon thawing.
Make ahead: The dough can be made up to 24 hours ahead, covered, and refrigerated. Allow it to soften slightly at room temperature for 15 minutes before scooping and rolling.
Serving Suggestions
These Peach Cookies are one of the most versatile and stunning desserts you can serve, fitting naturally into a wide range of occasions:
Arrange them on a tiered dessert stand surrounded by fresh peaches and mint sprigs for a summer dessert display that looks like pure art. They are especially beautiful at outdoor garden parties, bridal showers, and baby showers.
Serve them as part of a dessert spread alongside other summer fruit desserts. A platter of these peach cookies next to a bowl of peaches and cream creates a beautiful, cohesive summer dessert table that celebrates peach season in the most delightful way.
Package them individually in cellophane bags tied with ribbon for a homemade gift that earns immediate and enthusiastic reactions. These are among the most impressive edible gifts you can give, and they are genuinely special to receive.
Bring them to a summer gathering or potluck where you want to make an impression. Set them on the dessert table without explanation and watch the reactions as guests realize these are actual cookies, not actual peaches.
Frequently Asked Questions
Do the cookies actually taste like peaches?
The dough itself is a buttery, lightly sweet vanilla cookie. The peach flavor comes primarily from the jam filling inside. Together, the combination is deliciously peach-forward and perfectly complemented by the sparkling sugar coating.
How do I prevent the cookies from getting soggy during painting?
Use as little tinted milk as possible. Your paintbrush should be barely damp — dip it, then wipe most of the milk off against the rim of the bowl before applying it to the cookie. A light, thin wash of color is all you need. The sugar coating goes on immediately after and helps seal the surface.
Can I use store-bought cookie dough?
The homemade dough in this recipe is specifically designed to produce round, dome-shaped cookies that hold their shape when sandwiched — which is what creates the realistic peach shape. Store-bought dough tends to spread flat during baking and will not give you the same rounded result.
How many cookies does this recipe make?
This recipe makes approximately 34 individual cookie halves, which sandwich together into approximately 17 finished peach cookies.
Can I make these without food coloring?
The food coloring is what creates the peach-like appearance that makes these cookies so special. Without it, you have beautifully delicious sugar-coated sandwich cookies, but the visual effect will be lost. Natural food colorings derived from fruit and vegetable sources can be used as a substitute if you prefer to avoid artificial dyes.
Final Thoughts
These Peach Cookies are one of those recipes that genuinely rewards every minute of effort you put into them. They are playful, beautiful, completely delicious, and guaranteed to be the most talked-about thing on any dessert table. Whether you are making them for a special celebration, a summer gathering, or simply because you want to create something extraordinary, these cookies deliver joy from the moment people lay eyes on them all the way through to the last buttery, jammy, sparkling bite.
Peach Cookies
Ingredients
- 1 1/2 cups all-purpose flour
- 1 3/4 teaspoons baking powder
- 1/4 teaspoon salt
- 10 1/2 tablespoons butter softened
- 1/3 cup granulated sugar
- 1/4 cup packed light brown sugar
- 1 large egg
- 2 tablespoons sour cream
- 3/4 teaspoon vanilla extract
- Peach jam or preserves for filling
- 6 tablespoons milk divided into two portions of 3 tablespoons each
- Red food coloring
- Yellow food coloring
- 1/2 cup granulated sugar for rolling
- Fresh mint leaves for garnish (optional)
- A clean paintbrush
Instructions
- Preheat oven to 375 degrees Fahrenheit. Whisk together flour, baking powder, and salt in a medium bowl. Set aside.
- In a stand mixer fitted with the paddle attachment, beat butter, granulated sugar, and light brown sugar on medium-low for about 1 minute until creamy. Mix in the egg and vanilla. Add sour cream and mix until smooth.
- With the mixer on low, add the flour mixture and mix until just combined.
- Scoop dough one level tablespoon at a time. With buttered hands, roll each portion into a smooth ball. Place on a parchment-lined baking sheet and bake for 14 to 15 minutes until the bottoms are lightly golden. Cool completely on a wire rack.
- Spread about 1 teaspoon of peach jam across the flat bottom of one cookie. Press a second cookie over the jam to form a sandwich. Repeat with remaining cookies.
- Pour 3 tablespoons of milk into each of two small bowls. Tint one with red food coloring until vibrant pink and the other with yellow food coloring until bright yellow.
- Using a clean paintbrush, lightly paint yellow milk across each cookie, leaving some areas bare. Then paint red milk across unpainted areas, blending where the colors meet. Use as little milk as possible.
- Immediately roll each painted cookie in granulated sugar to coat all over. Tuck fresh mint leaves into the side of each cookie as a peach leaf garnish if desired.
- Store in an airtight container.
Notes
Roll in sugar immediately after painting while the surface is still slightly damp so the sugar adheres.
Work one or two cookies at a time through the paint-and-roll process.
Butter your hands before rolling the dough to prevent sticking.
Cool cookies completely before filling or the jam will run.
Store at room temperature in an airtight container for up to 3 days, or refrigerate for up to 5 days.
Unfilled, undecorated cookie halves can be frozen for up to 2 months.