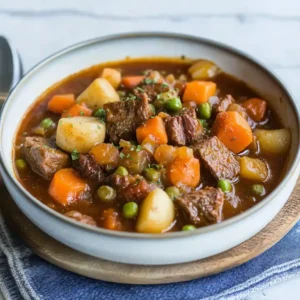
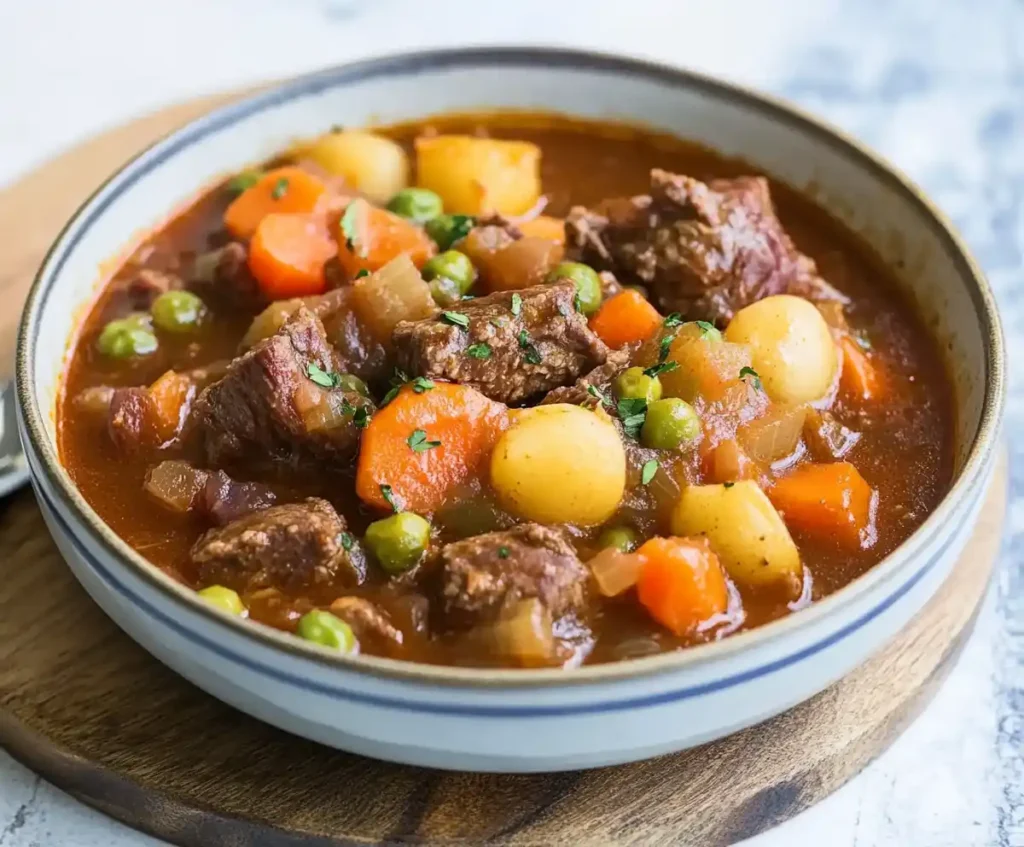
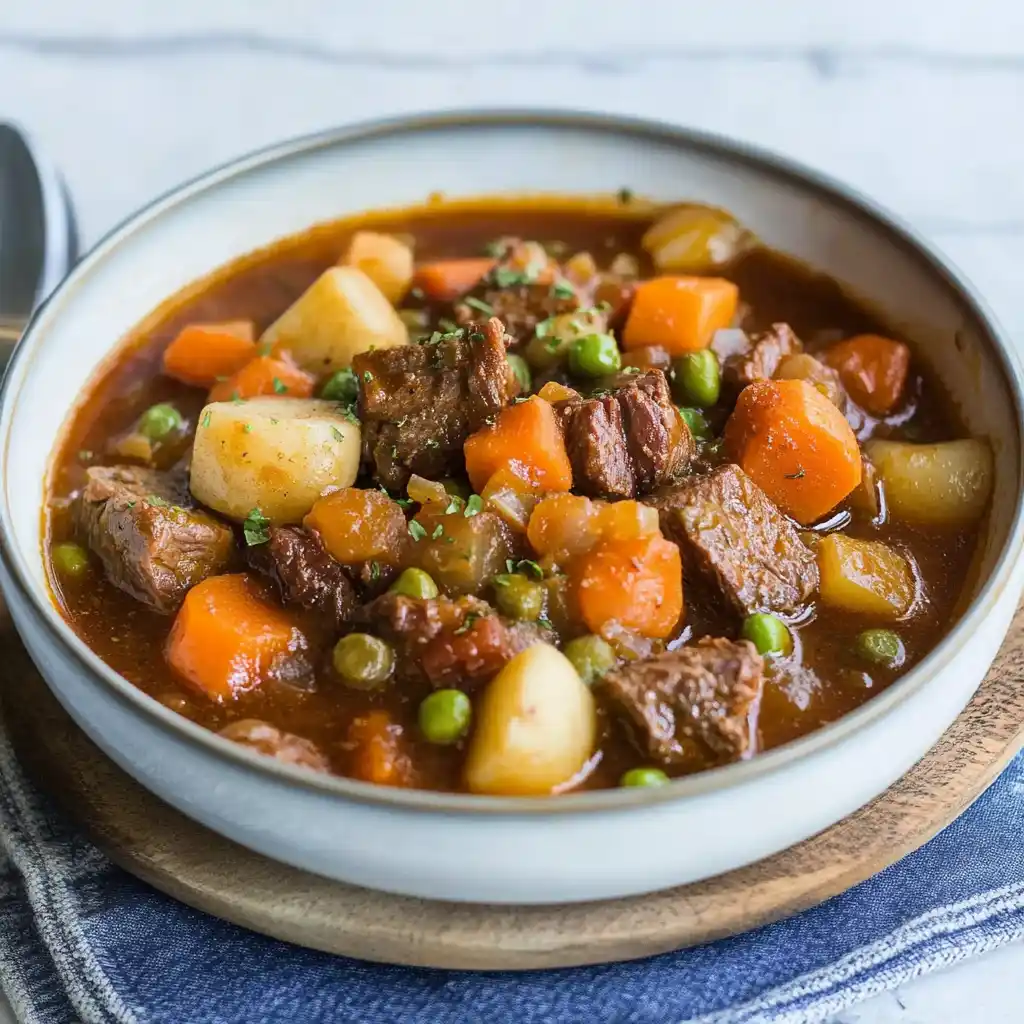
There’s something about a bowl of Pressure Cooker Beef Stew that feels like home. I grew up watching my mom simmer stew for hours, but now with my pressure cooker, I can have the same comforting flavors in a fraction of the time. This recipe is perfect when you crave cozy food without the long wait. It’s a family favorite, and I love serving it with crusty bread to soak up every drop. If you’re exploring more Pressure Cooker Recipes, this one’s a must-try. My kids say it tastes like a hug in a bowl! I also shared something similar in my slow cooker beef stew if you prefer a low-and-slow method.

What You’ll Need
Here’s what goes into my stew—and a few notes I’ve learned along the way:
- Beef chuck roast – I like chuck because it becomes melt-in-your-mouth tender.
- Potatoes – Baby potatoes or russets both work; I leave the skin on for extra flavor.
- Carrots – They add natural sweetness and color.
- Celery – For that classic stew flavor.
- Onion & garlic – Fresh is always best; it makes the base so rich.
- Tomato paste – Deepens the broth.
- Beef broth – I use low-sodium so I can season to taste.
- Peas – Stirred in at the end for freshness.
- Seasonings – Bay leaf, thyme, salt, and pepper.
I always keep air fryer chicken wings on standby for nights when I want a fun side with stew—it’s a surprisingly good combo!
Step-by-Step Guide to Pressure Cooker Beef Stew
This stew comes together quickly but tastes like it cooked all day. I’ve also linked one of my pasta favorites—spaghetti carbonara—because I often rotate it with this stew for easy weeknight meals.
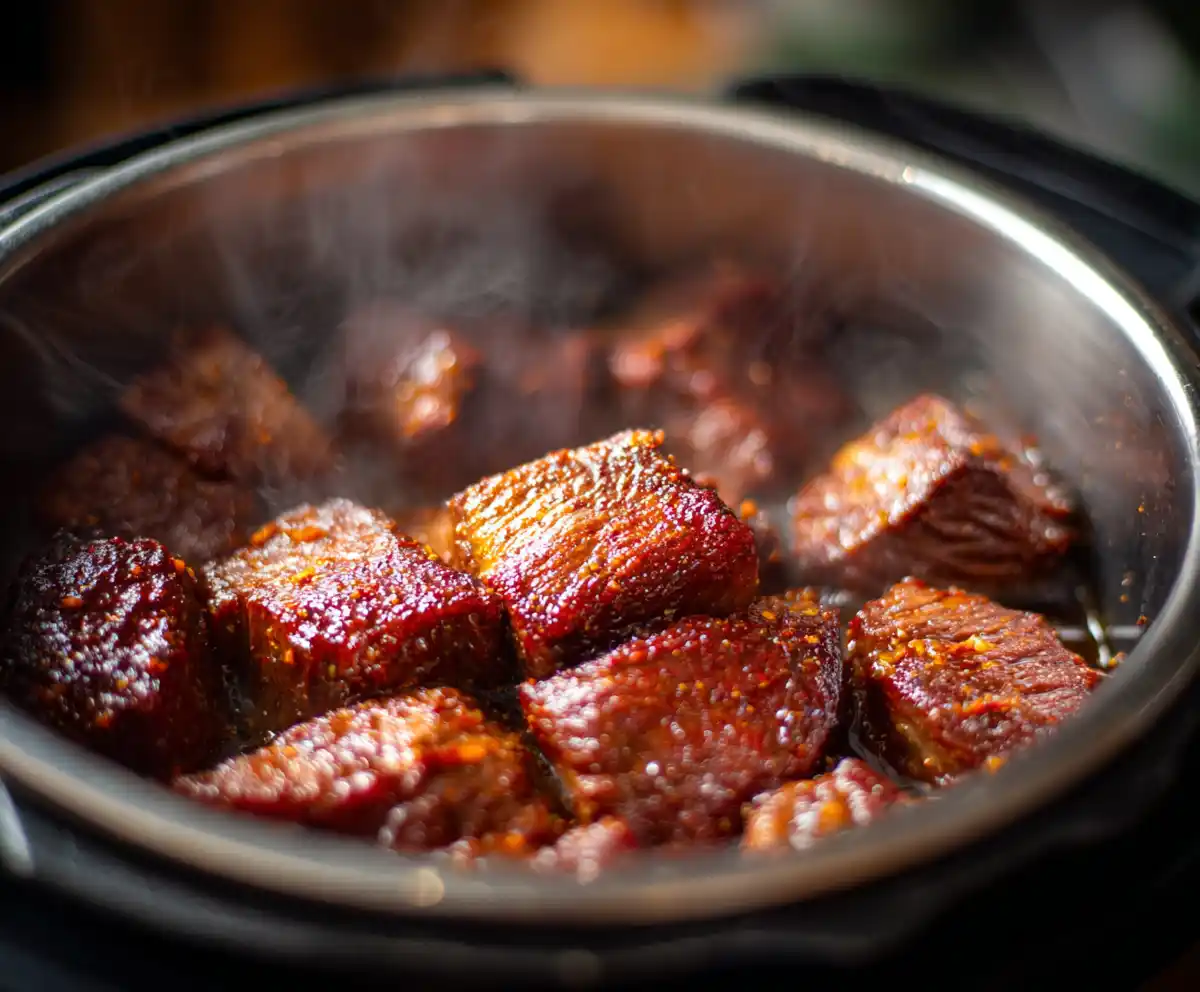
Step 1 — Sear the Beef
Start by browning the beef chunks in a little oil on sauté mode. This step builds deep flavor, so don’t rush it. I always let the meat get a nice crust.

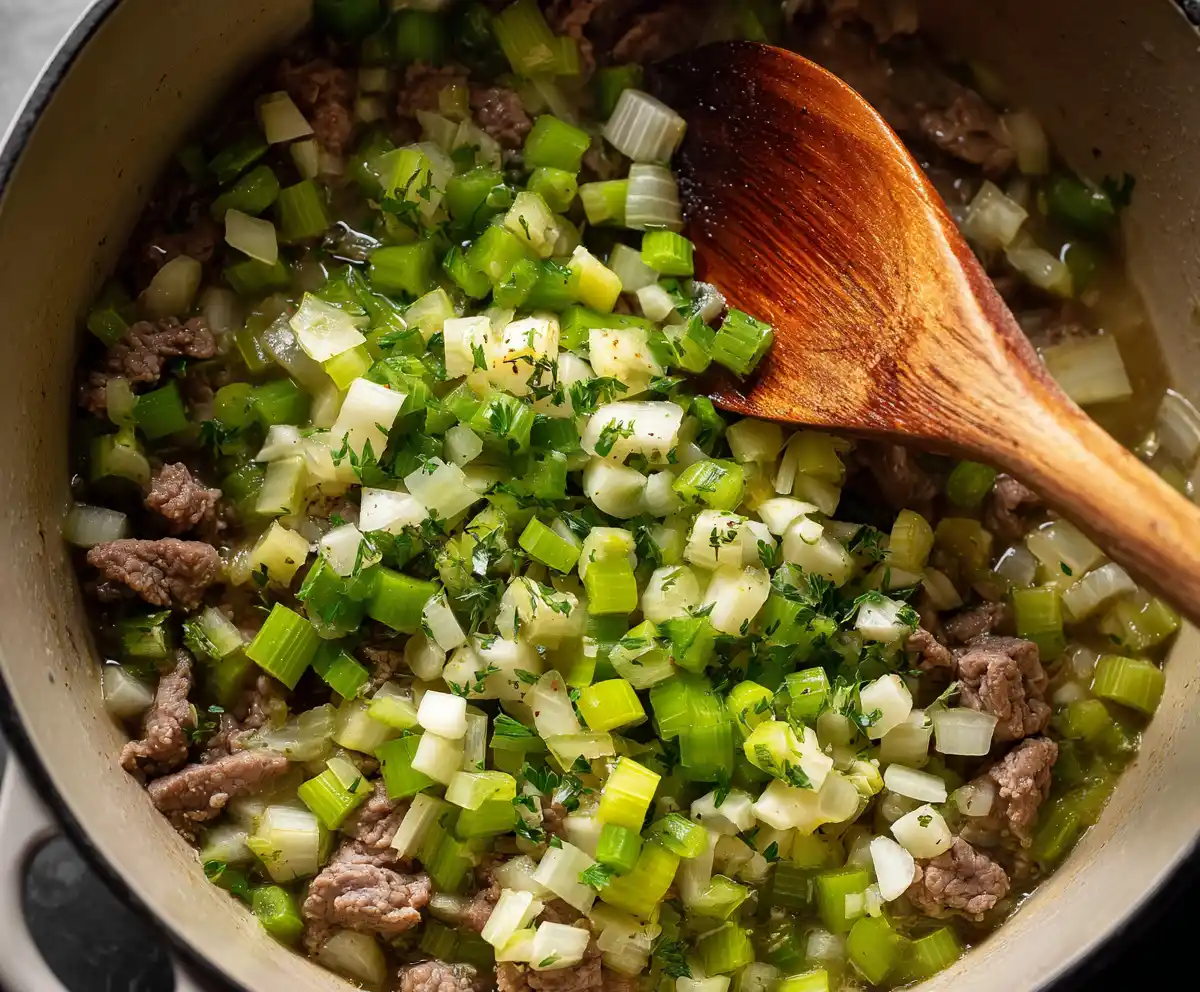
Step 2 — Add Aromatics
Toss in the onion, garlic, and celery. Sauté until fragrant. The smell at this stage reminds me of my grandmother’s kitchen—warm and inviting.

Step 3 — Deglaze
Add a splash of beef broth to scrape up all those browned bits. Don’t skip this—it’s where the flavor hides!

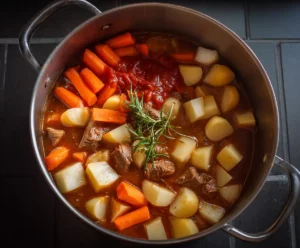
Step 4 — Build the Stew
Stir in tomato paste, carrots, potatoes, the rest of the broth, and seasonings. I like to tuck the bay leaf right in the middle.

Step 5 — Pressure Cook
Lock the lid and cook on high pressure for 35 minutes. It’s amazing how quickly the beef becomes fork-tender.
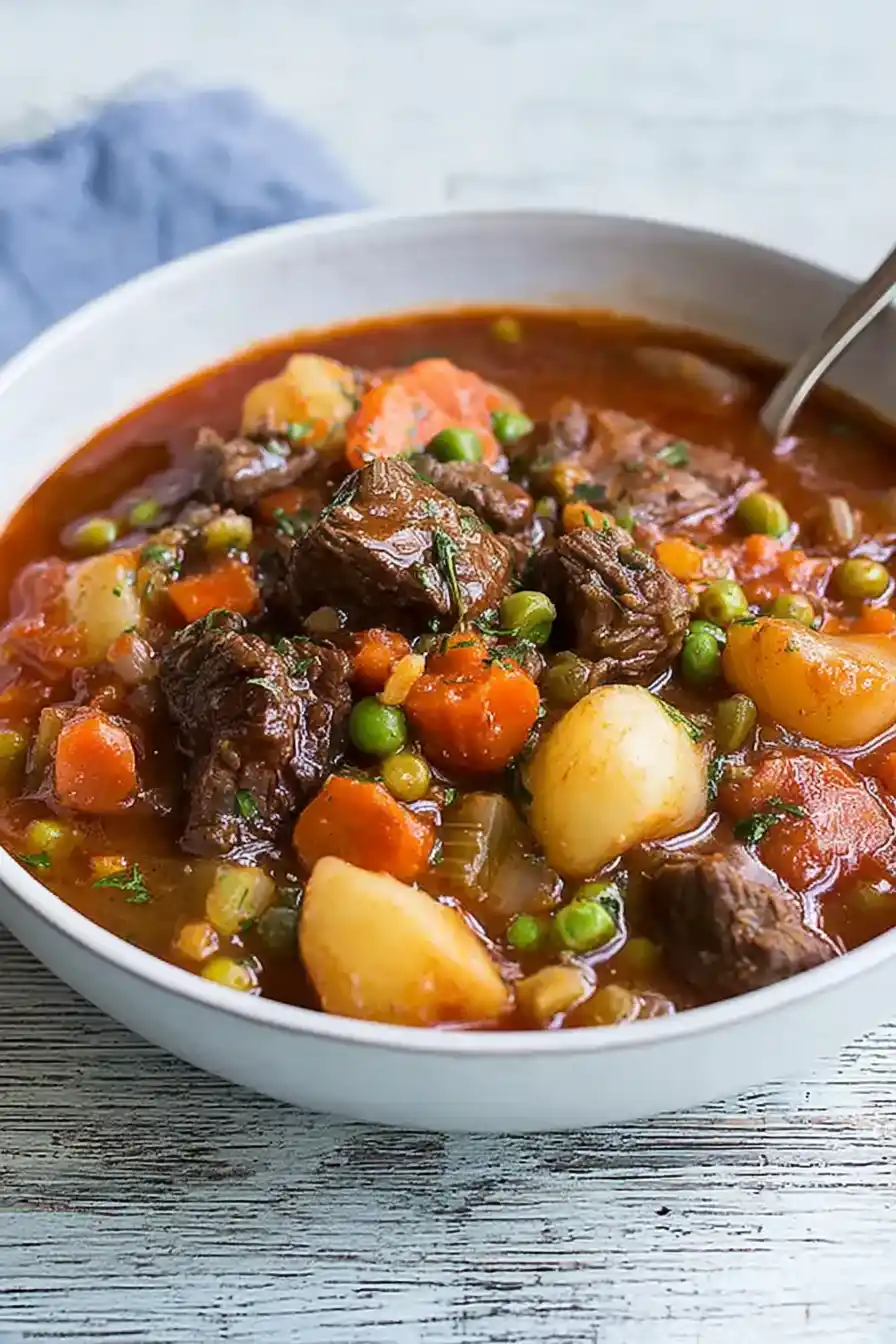
Step 6 — Finish with Peas
Once you release pressure, stir in the peas. They brighten everything up and make the stew feel fresh.
Pro Tips & Easy Swaps
- Use beef chuck for best tenderness.
- Add a splash of red wine when deglazing for depth.
- Frozen peas work perfectly—no need to thaw.
- If you like thicker stew, mash a few potatoes at the end.
- Want it lighter? Swap half the potatoes for parsnips.
- Fresh herbs (like thyme) always lift the flavor.
- Double the recipe—it freezes beautifully.
- If you like a spicy kick, add a pinch of red pepper flakes.
Serving Ideas & Variations
I often serve this stew with warm bread, but it’s also wonderful over rice or even buttered noodles. Here are a few ideas:
- With crusty sourdough bread.
- Over mashed potatoes for extra comfort.
- Paired with a fresh green salad.
- Ladled over egg noodles.
- With roasted vegetables on the side.
- Topped with fresh parsley and a squeeze of lemon.
Common Mistakes (and How to Fix Them)
- Beef too tough? Cook longer—chuck needs time to soften.
- Too watery? Let it simmer on sauté mode to reduce.
- Lacking flavor? Add a spoon of tomato paste or an extra bouillon cube.
- Vegetables mushy? Cut them in larger chunks.
Frequently Asked Questions
Yes, but you’ll need to add extra cooking time. I recommend thawing for best searing results.
Absolutely! Beef stew tastes even better the next day as the flavors meld together.
Mash a few potatoes into the broth or stir in a cornstarch slurry at the end.
Yes, this stew freezes well. Just cool completely before transferring to freezer-safe containers.
Pressure Cooker Beef Stew
Ingredients
- 2 lbs beef chuck cut into chunks
- 1 tbsp oil
- 1 onion chopped
- 3 garlic cloves minced
- 3 carrots chopped
- 3 potatoes cubed
- 2 celery stalks chopped
- 2 tbsp tomato paste
- 4 cups beef broth
- 1 bay leaf
- 1 tsp dried thyme
- Salt & pepper to taste
- 1 cup frozen peas
Instructions
- Sear beef in oil on sauté mode until browned.

- Add onion, garlic, and celery; cook until fragrant.

- Deglaze with a splash of broth, scraping the pot.

- Stir in tomato paste, carrots, potatoes, broth, and seasonings.
- Pressure cook on high for 35 minutes.
- Quick release, stir in peas, and serve.