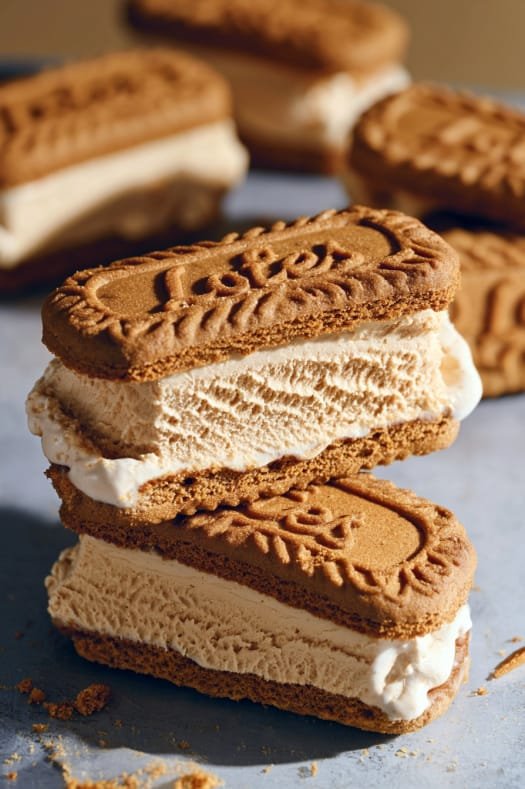
If you’re a Biscoff fan, brace yourself, because these ice cream sandwiches might just become your new obsession. Creamy, spiced Biscoff ice cream gets sandwiched between crisp, caramelized Biscoff cookies, creating a dessert that tastes like it came straight from a specialty ice cream shop. The best part? There’s no ice cream maker involved, and the whole thing comes together with just four ingredients.
This is one of those recipes that looks impressive but is genuinely simple to pull off. It’s a great one to keep in your back pocket for warm-weather entertaining, alongside other frozen favorites like this dreamy grasshopper pie. Once you try the no-churn method, you’ll wonder why you ever thought homemade ice cream desserts required special equipment.
Why You’ll Love This Recipe
- No ice cream maker required. The whipped cream base gives you that same soft, creamy texture without any special tools.
- Only four ingredients. Simple pantry staples come together to create something that tastes far more elaborate than it is.
- Built-in crunch. The Biscoff cookies add texture and that signature caramelized, spiced flavor in every bite.
- Make-ahead dessert. These sandwiches need to freeze anyway, so they’re perfect for prepping a day or two before you need them.
- Naturally portioned. Slicing the block into sandwiches means portion control is already built right in.
Ingredients
- 30 Biscoff cookies
- 400 g whipping cream or heavy cream
- 1 tablespoon vanilla extract
- 200 g Biscoff spread, warmed until runny
Step-by-Step Instructions
- Prepare your pan. Line a 9×9-inch pan with parchment paper, letting the paper overhang on all sides so you can easily lift the finished block out later.
- Whip the cream. In a large mixing bowl, combine the whipping cream and vanilla extract. Using an electric hand mixer, beat until firm, stiff peaks form.
- Fold in the Biscoff spread. Warm the Biscoff spread in the microwave in 15-second bursts until it’s smooth and pourable. Slowly drizzle it into the whipped cream while gently folding with a spatula, continuing until the mixture is completely streak-free.
- Build your layers. Place a layer of Biscoff cookies along the bottom of the lined pan, trimming any cookies as needed to fill in gaps. Pour the whipped cream mixture over the cookies and spread it into an even layer using an offset spatula. Top with a second layer of Biscoff cookies, lining them up to match the bottom layer.
- Freeze until set. Cover and freeze for at least 4 hours, though leaving it overnight will give you the best texture.
- Slice and serve. Use the parchment overhangs to lift the frozen block out of the pan, then slice it into however many sandwiches you’d like.
Expert Tips
- Make sure your whipping cream is very cold before you start; this helps it whip to stiff peaks more quickly and reliably.
- Let the Biscoff spread cool slightly after microwaving so it doesn’t deflate the whipped cream when folded in.
- A sharp knife dipped in warm water makes slicing through the frozen layers much cleaner.
- If you like extra crunch, save a few cookies to crumble over the top before freezing.
Variations
- Add a chocolate drizzle. A layer of melted dark or white chocolate between the cookie and cream layers adds another dimension of flavor.
- Mix in cookie crumbs. Fold crushed Biscoff cookies directly into the whipped cream mixture for extra texture throughout.
- Try a different cookie. While Biscoff is the star here, you could experiment with other crunchy speculoos-style biscuits if you want to switch things up.
- Pair with other frozen treats. Serve alongside slices of strawberry swirl cheesecake for a dessert table with plenty of variety.
Storage and Reheating
Keep any leftover sandwiches wrapped individually or stored in an airtight container in the freezer, where they’ll stay fresh for up to two weeks. No reheating is needed — just let them sit at room temperature for a couple of minutes before serving so they’re easier to bite into.
Serving Suggestions
These sandwiches are rich enough to enjoy on their own, but a drizzle of extra warmed Biscoff spread over the top never hurts. They also make a fun addition to a dessert spread alongside cranberry bliss bars or a plate of salted caramel brownie cookies for guests who want to sample a little bit of everything.
FAQ
Can I use a hand whisk instead of an electric mixer?
You can, but it will take significantly longer to reach stiff peaks. An electric hand mixer makes this step much faster and easier.
Do I need to use heavy cream, or will whipping cream work?
Either works well here, though heavy cream tends to hold its whipped texture slightly longer once frozen.
Why did my whipped cream deflate when I added the Biscoff spread?
This usually happens if the spread is too hot. Let it cool slightly after microwaving so it’s warm but not hot before folding it in.
Can I make these ahead for a party?
Absolutely. These freeze well, so making them a day or two in advance actually makes slicing and serving easier.
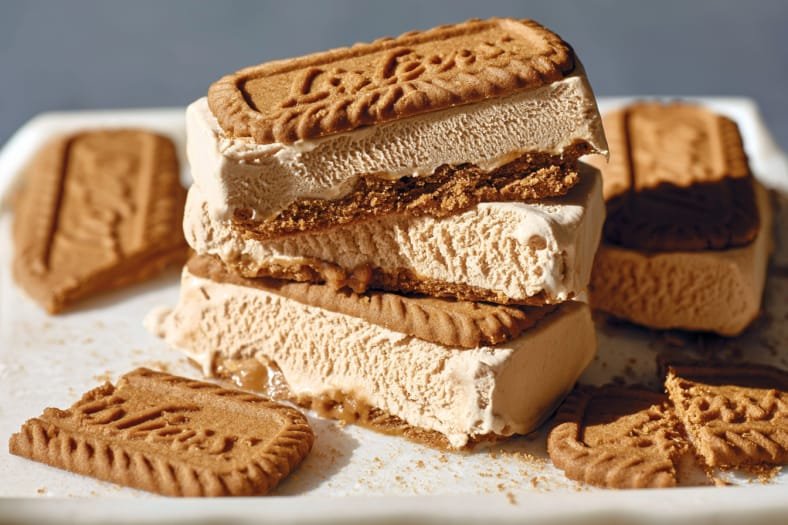
There’s something so satisfying about slicing into a block of homemade Biscoff ice cream sandwiches and seeing those clean, crunchy layers. Whether you’re making them for a summer gathering or just treating yourself to something sweet, this no-churn method proves that you don’t need an ice cream maker to create a truly incredible frozen dessert.
Biscoff Ice Cream Sandwiches
Ingredients
- 30 Biscoff cookies
- 400 g whipping cream or heavy cream
- 1 tablespoon vanilla extract
- 200 g Biscoff spread warmed until runny
Instructions
- Line a 9×9-inch pan with parchment paper on all sides, leaving an overhang for easy removal.
- In a large bowl, combine the whipping cream and vanilla extract. Beat with an electric hand mixer until firm peaks form.
- Warm the Biscoff spread in the microwave in 15-second intervals until runny. Slowly stream it into the whipped cream while folding with a spatula until no streaks remain.
- Arrange a layer of Biscoff cookies in the bottom of the lined pan, trimming to fit as needed. Pour the whipped cream mixture over the cookies and smooth into an even layer. Top with a second layer of Biscoff cookies, matching the bottom layer’s orientation.
- Freeze for at least 4 hours, or preferably overnight.
- Lift the frozen block out using the parchment overhangs, then slice into individual ice cream sandwiches.
Notes
For the cleanest slices, use a sharp knife dipped in warm water between cuts. Letting the block freeze overnight gives the best texture and makes slicing easier.